CREATING A BOOT-PORTABLE PENDRIVE – DISKPART – ForumWiedzy.pl
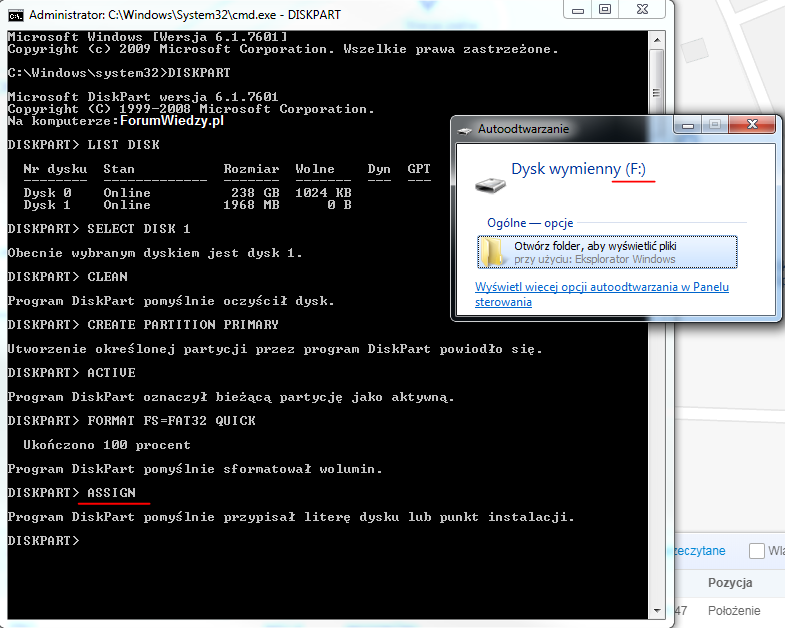
- Insert the USB flash drive into the socket on your desktop computer or laptop
- Click START and enter „CMD”, „cmd.exe” will be displayed, right-click on the program and select „Run as administrator”
- Enter „DISKPART” – open the program to manage disks, partitions from the Windows cmd.exe console
- Enter „LIST DISK” – listing all disks, including the last flash drive and the disk number: 1
- Enter „SELECT DISK 1” – select the disk number of your pendrive
- Enter „CLEAN” – cleaning the pendrive from the partition and erasing the data from the MBR / GPT
- Enter „CREATE PARTITION PRIMARY” – create a root partition on a pendrive
- Enter „ACTIVE” – designation of the current partition as active
- Enter „FORMAT FS = FAT32 QUICK” or „FORMAT FS = NTFS QUICK” – formatting partitions in the selected file system
- Enter „ASSIGN” – automatic assignment of the first free drive letter for the partition created and formatted on the pendrive, eg F:
END, your pendrive is now bootable, if you like, you can copy the contents of the Windows disc to the pendrive and start the system installation from the pendrive.
See the video tutorial, step by step:
Views: 3
